Ultimate 5-Minute Peppermint Chocolate Bark – Easy Christmas Dessert
Peppermint Chocolate Bark is the no-stress holiday treat everyone loves. It’s festive, it looks impressive, and it comes together in minutes with just a handful of ingredients. If the season has you short on time but big on cheer, this peppermint chocolate bark is your new go-to.
It’s crunchy, minty, and perfectly chocolatey—ideal for gifting, dessert trays, or a quick sweet bite after dinner. Best of all, you don’t need any special tools or baking skills to make it.
Why This Peppermint Chocolate Bark Recipe Works
This chocolate bark leans on a smart, simple method: melt, spread, sprinkle, and set. There’s no tempering required if you use good baking chocolate or candy wafers, so you get a smooth finish without fuss.
The peppermint adds brightness and a bit of crunch, balancing the sweetness of the chocolate. Layering dark and white chocolate gives you a classic look and a nice flavor contrast. And since it firms up quickly, you can make it right before a party—or in the five minutes before you need a last-minute gift.
Ingredients for Peppermint Chocolate Bark
- Dark or semisweet chocolate (10–12 ounces), chopped or in chips
- White chocolate (8–10 ounces), chopped or in chips (optional but recommended for layering)
- Crushed candy canes or peppermint candies (about 1/2 cup)
- Peppermint extract (1/4–1/2 teaspoon, optional for extra mint flavor)
- Coconut oil or neutral oil (1–2 teaspoons, optional for smoother melting)
- Flaky sea salt (a pinch, optional)
- Equipment: Microwave-safe bowls or a small pot and heatproof bowl for double boiler, rubber spatula, baking sheet, parchment paper
Instructions for Peppermint Chocolate Bark
- Prep the pan. Line a baking sheet with parchment paper.Clear a spot in the fridge or a cool counter for quick setting.
- Melt the dark chocolate. Place dark or semisweet chocolate in a microwave-safe bowl. Microwave in 20–30 second bursts, stirring between each, until smooth. (Alternatively, melt over a double boiler.) Stir in 1 teaspoon oil for shine if you like.
- Flavor it (optional). Add 1/4 teaspoon peppermint extract to the dark chocolate. Stir well.Taste a tiny bit; add up to another 1/4 teaspoon if you want a stronger mint kick.
- Spread the base. Pour the dark chocolate onto the parchment and spread to about 1/4-inch thick. Aim for a rectangle roughly 9×12 inches, but don’t stress the shape.
- Melt the white chocolate. In a clean bowl, melt white chocolate using the same method. White chocolate scorches easily, so keep the bursts short.Stir until silky.
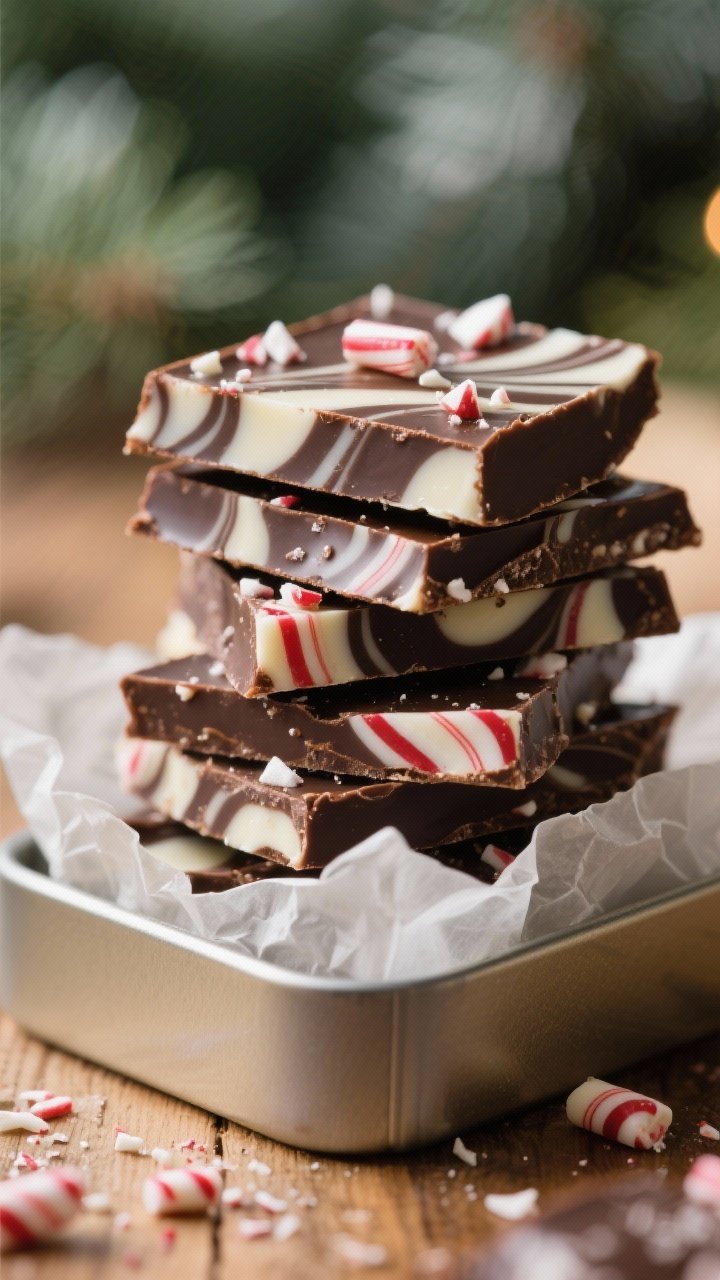
- Create the swirl or layer. Drizzle the white chocolate over the dark layer. Use a spatula or toothpick to swirl gently, or spread it evenly for a clean layered look.
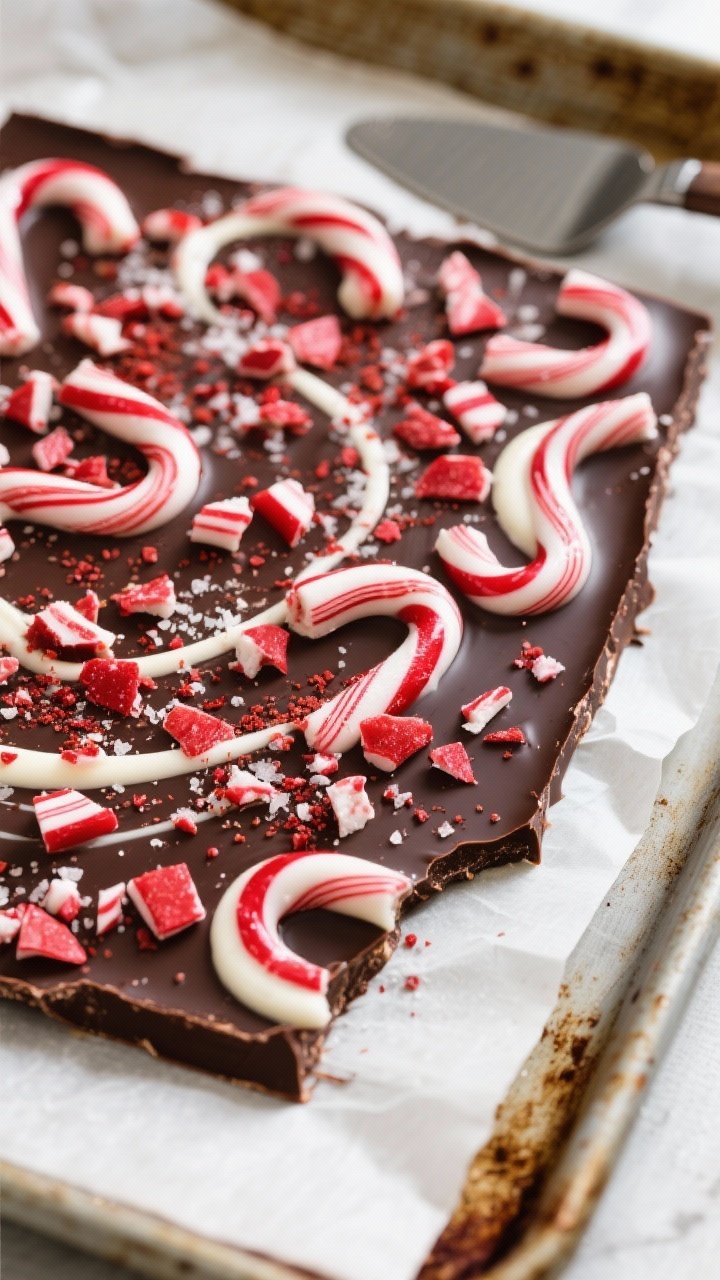
- Add crunch. Sprinkle crushed candy canes across the top while the chocolate is still wet. Add a small pinch of flaky sea salt if you like that sweet-salty contrast.
- Set and break. Let the bark set at room temperature for 30–45 minutes, or pop it in the fridge for 10–15 minutes until firm.Break into pieces with your hands or use a sharp knife for cleaner edges.
- Serve or gift. Pile onto a platter, tuck into tins with parchment, or bag up for easy gifts. Keep extras stored properly (see below).
Keeping Peppermint Chocolate Bark Fresh
Store the bark in an airtight container at cool room temperature for up to two weeks. If your kitchen is warm, keep it in the fridge to prevent melting or bloom (those harmless whitish streaks).
Place parchment between layers so pieces don’t stick together. For long-term storage, freeze in a sealed container for up to two months. Thaw in the fridge, then bring to room temp before serving to avoid condensation.
Benefits of This Peppermint Chocolate Bark Recipe
- Super fast: Truly five minutes of hands-on time, plus quick setting.
- Beginner-friendly: No baking, no tempering, no special tools.
- Budget-conscious: Simple ingredients, big holiday payoff.
- Flexible: Works with dark, milk, or white chocolate and different toppings.
- Giftable: Looks festive, packs well, and stays fresh.
- Scalable: Double or triple the batch for parties or gift boxes.
Pitfalls to Watch Out For
- Overheating chocolate: Chocolate burns fast.Use short microwave bursts and stir often.
- Water contact: Even a drop can seize chocolate. Keep bowls and spatulas bone-dry.
- Thick layers: Too thick and it’s hard to bite; aim for about 1/4-inch.
- Slow topping: Sprinkle candy canes while the chocolate is wet so they stick.
- Too much extract: Peppermint extract is strong. Start small and taste as you go.
- Humidity: Moisture can make candy canes sticky.Store in airtight containers.
Variations You Can Try
- Milk Chocolate Bark: Swap dark chocolate for milk chocolate for a creamier, sweeter base.
- Triple Chocolate: Use dark, milk, and white chocolate in ribbons for a marbled effect.
- Nutty Crunch: Add chopped toasted almonds, pistachios, or pecans for texture and flavor.
- Espresso Mint: Stir 1 teaspoon instant espresso powder into the dark chocolate for a mocha-mint vibe.
- Gluten-Free Friendly: Most chocolates and candy canes are naturally gluten-free—just check labels.
- Dairy-Free Version: Use dairy-free chocolate chips and skip white chocolate or use a dairy-free white bar.
- Spiced Peppermint: Add a pinch of cinnamon or cardamom to the dark chocolate for warmth.
- Drizzle Finish: After setting, drizzle extra white or dark chocolate on top for a polished look.
FAQ
Do I need to temper the chocolate?
No. For quick holiday bark, melting chocolate gently is enough. If you want a glossy snap that lasts at room temperature for days, tempering helps, but it’s not necessary for this recipe.
What kind of chocolate works best?
Use good-quality baking bars or melting wafers for the smoothest results.
Chocolate chips are fine, but they contain stabilizers and can be thicker when melted. If using chips, add 1–2 teaspoons of oil to help loosen the texture.
How do I crush candy canes without a mess?
Place them in a zip-top bag, seal, and gently tap with a rolling pin or the bottom of a saucepan. Aim for a mix of small chunks and peppermint “dust” for a pretty finish and even flavor.
My chocolate seized.
Can I fix it?
If your chocolate turns grainy and thick, whisk in 1 teaspoon of warm neutral oil at a time until smooth. It may not be perfect, but it’s usually salvageable for bark.
Can I make it ahead?
Yes. Make the bark up to two weeks in advance and store it airtight in a cool, dry place.
For gifting, pack it the day you deliver so it looks its best.
How do I get neat, even pieces?
For cleaner cuts, chill the set bark briefly, then use a sharp knife warmed under hot water and wiped dry. Or embrace the rustic look and snap by hand.
Is peppermint extract necessary?
No. The crushed candy canes add plenty of minty flavor on their own.
Extract simply boosts the mint for those who like it stronger.
Can I skip white chocolate?
Absolutely. A single dark chocolate layer with candy canes is classic and delicious. The white chocolate adds contrast and sweetness, but it’s optional.
Final Thoughts
This 5-minute peppermint chocolate bark is the kind of dessert that makes the holidays feel easy and fun.
It looks festive, tastes like pure December, and requires almost no effort. Keep a batch on hand for quick gifting, last-minute dessert trays, or whenever you want something sweet and minty. Once you make it, you’ll come back to it every season—and probably a few times in between.

Ingredients
Method
- Prep the pan. Line a baking sheet with parchment paper. Clear a spot in the fridge or a cool counter for quick setting.
- Melt the dark chocolate. Place dark or semisweet chocolate in a microwave-safe bowl. Microwave in 20–30 second bursts, stirring between each, until smooth. (Alternatively, melt over a double boiler.) Stir in 1 teaspoon oil for shine if you like.
- Flavor it (optional). Add 1/4 teaspoon peppermint extract to the dark chocolate. Stir well. Taste a tiny bit; add up to another 1/4 teaspoon if you want a stronger mint kick.
- Spread the base. Pour the dark chocolate onto the parchment and spread to about 1/4-inch thick. Aim for a rectangle roughly 9x12 inches, but don’t stress the shape.
- Melt the white chocolate. In a clean bowl, melt white chocolate using the same method. White chocolate scorches easily, so keep the bursts short. Stir until silky.
- Create the swirl or layer. Drizzle the white chocolate over the dark layer. Use a spatula or toothpick to swirl gently, or spread it evenly for a clean layered look.
- Add crunch. Sprinkle crushed candy canes across the top while the chocolate is still wet. Add a small pinch of flaky sea salt if you like that sweet-salty contrast.
- Set and break. Let the bark set at room temperature for 30–45 minutes, or pop it in the fridge for 10–15 minutes until firm. Break into pieces with your hands or use a sharp knife for cleaner edges.
- Serve or gift. Pile onto a platter, tuck into tins with parchment, or bag up for easy gifts. Keep extras stored properly (see below).
Printable Recipe Card
Want just the essential recipe details without scrolling through the article? Get our printable recipe card with just the ingredients and instructions.

Hi, I’m Hannah — the food lover behind Every Day Quick Meals! I’m all about making cooking simple, joyful, and stress-free. Between work, life, and a million to-dos, I know how hard it can be to find time for homemade food. That’s why I create quick, tasty recipes that anyone can make — no fancy skills required. My kitchen motto? Good food doesn’t need to be complicated — just made with love.